I was looking for a simple way in Power BI to manually add a row to an existing table using Power Query, which is not something that is supported through the menu of Power Query, but is something you can accomplish through the Advanced Editor.
For this example I want to add a row to a dimension table "Ticket priority" to identify unknown or null rows in my fact table "Tickets".
The ticket priority table looks like this.

I want to add a new row with the values 0 for priority_id and Unknown for priority.
Advanced Editor
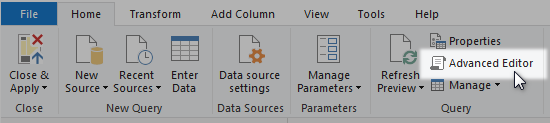
To do this, click the Advanced Editor button in the menu. The button is on the Home tab and on the View tab.


In the code you see, every line corresponds to an applied step that you see in the Power Query editor in the right side.
In Power Query M and in this example, everything between the let and in statement will define a step. Each line of code starts with the name of the step, followed by a equal sign and then followed by a Power Query M function. Each step line ends with a comma. Each line will generate a table as output.
The line after the in statement defines which step name will provide the table output. In this case the step name of the last step #"Changed Type".
Add a step
Now lets add the new step using a line of Power Query M code. To start, add a comma after the #"Changed Type" step line and press the Enter button to add a new line. Then, copy and paste the following line:
With this line we create a new step named "Add Unknown row" and use the function Table.InsertRows to add a new row to the table. To find out how the function Table.InsertRows works, look at the documentation from Microsoft.
The syntax explanation is as follows:
Table.InsertRows(table as table, offset as number, rows as list) as table
So Table.InsertRows will take a table, an offset and a list of rows as parameters. In our case the table is the output table of the previous step #"Changed Type", the offset is 0 (zero) to put the new row at the top of the table.
Between the brackets the new row is defined. We'll set the value of the priority_id column to 0 (zero) and the Priority column to "Unknown". (When you have more columns, just add these columns between the brackets separated by a comma and define the column name and value as in the example.)
And lastly we change the line after the in statement and change it to #"Add unknown row", to use the output table of the step we just added.

After clicking the Done button you will see under the applied steps, our new step has been added and in the table you see that the first row is our new Unknown row.
