Showing posts with label powerbi. Show all posts

August 1, 2025

How do I connect to an Excel file on SharePoint using Power BI or Power Query?

When getting started with Power BI, you might connect to an Excel file to build your report. You simply open Power BI Desktop, click the Excel workbook button, choose your Excel file from My Documents or OneDrive, and click load and you create your beautiful report.

Refresh option disabled

After publishing your report to a Fabric workspace and going to the settings of you semantic model, you may find that under the settings section Refresh the refresh option for the semantic model is greyed out and disabled.

Semantic model refresh disabled


Under the settings section Gateway and cloud connections you will also see a warning that you do not have a personal gateway installed. So what happened and why can't you refresh your published report automatically? Should I install a personal gateway? NO!


Why?

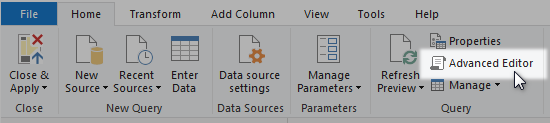
To understand what happened, we first need to go to Power Query, which you can get to by clicking the Transform data button in Power BI Desktop.


In Power Query in the left Queries pane, click on the query that derived from you Excel file.
Then in the right Applied Steps pane click on the Source step.
In the formula bar you will see that the path to your Excel file is a path on your local computer. For example C:\Users\name\OneDrive\Documents\test file.xlsx.


While this file is on the local drive of your computer, Microsoft Fabric and the refresh service is a cloud based and Fabric cannot connect to your laptop to extract the data from the specific file.

Do not use a gateway!

You might be able to solve it by installing a personal gateway, but your computer has to always be on and connected to the internet for Fabric to reach it. But installing a personal gateway is not best practice and hopefully Microsoft will get rid of this option in the future.

Connect to Excel on SharePoint or OneDrive

So how can I connect to the Excel file that is saved in SharePoint or OneDrive?

You need to take the following steps:

  1. When you are using Windows 11 and your file is on OneDrive, you can go to your Documents folder on you computer and right-click on the file, click Show more option and click View online.


  2. Or, when you know the direct link, go to the SharePoint or OneDrive folder where you Excel file is saved using your browser.
  3. In SharePoint or OneDrive you will see you folder and saved file.
  4. On the right side you see the Details button


  5. Click on the button, select the Excel file and scroll down in the details pane. You will see a option to copy the file's path. Click the copy button.

  6. Now open Power BI Desktop, click the Get data button and click Web.


  7. Paste the URL copied from the details pane and click the OK button.


  8. You might need to authenticate using your Organizational account. After that the Excel file should load into Power BI Desktop.
  9. After publishing your report to a workspace, you are now able to schedule a refresh. But you probably need to add your credentials to the connection in the semantic model settings under the section Data source credentials.

May 19, 2021

How can I manually add a row to an existing table in Power Query?

I was looking for a simple way in Power BI to manually add a row to an existing table using Power Query, which is not something that is supported through the menu of Power Query, but is something you can accomplish through the Advanced Editor.

For this example I want to add a row to a dimension table "Ticket priorityto identify unknown or null rows in my fact table "Tickets".

The ticket priority table looks like this.

Ticket priority example table

I want to add a new row with the values 0 for priority_id and Unknown for priority. 

Advanced Editor

To do this, click the Advanced Editor button in the menu. The button is on the Home tab and on the View tab.

Advanced Editor on the Home tab
Advanced Edtiror in the View tab

After clicking on the button, the Advanced Editor window will show you Power Query M code. If you're unexperienced in this area, I will not in depth in explaining how Power Query M works. There are enough resources to find for this. But I will explain how the lines of code that you see correspond to the applied steps that you might know.
Advanced Editor Explained

In the code you see, every line corresponds to an applied step that you see in the Power Query editor in the right side. 

In Power Query M and in this example, everything between the let and in statement will define a step. Each line of code starts with the name of the step, followed by a equal sign and then followed by a Power Query M function. Each step line ends with a comma. Each line will generate a table as output.

The line after the in statement defines which step name will provide the table output. In this case the step name of the last step #"Changed Type".

Add a step

Now lets add the new step using a line of Power Query M code. To start, add a comma after the #"Changed Type" step line and press the Enter button to add a new line. Then, copy and paste the following line:

#"Add Unknown row" = Table.InsertRows(#"Changed Type", 0, {[priority_id=0, Priority="Unknown"]})

With this line we create a new step named "Add Unknown row" and use the function Table.InsertRows to add a new row to the table. To find out how the function Table.InsertRows works, look at the documentation from Microsoft.

The syntax explanation is as follows: 

Table.InsertRows(table as table, offset as number, rows as list) as table

So Table.InsertRows will take a table, an offset and a list of rows as parameters. In our case the table is the output table of the previous step #"Changed Type", the offset is 0 (zero) to put the new row at the top of the table.

Between the brackets the new row is defined. We'll set the value of the priority_id column to 0 (zero) and the Priority column to "Unknown". (When you have more columns, just add these columns between the brackets separated by a comma and define the column name and value as in the example.)

And lastly we change the line after the in statement and change it to #"Add unknown row", to use the output table of the step we just added.

Full code example

After clicking the Done button you will see under the applied steps, our new step has been added and in the table you see that the first row is our new Unknown row.

Result


July 18, 2020

How can I process the latest file from multiple folders using Power BI?

I asked myself this question when I wanted to import cost analysis data from Azure. In Azure Cost Management there is an option to schedule a daily export with week-to-date or month-to-date cost analysis data. You can export the files to an Azure storage account.

When you do this, the export process will create a folder per year and month (“[start date]-[end date]”). And because it’s a to-date export, every file will contain the cost analysis data from all days in the month until the date of export.
The problem here is that when you export all files, you will be importing duplicate cost records for each day in the month. And you will also be importing and transforming a lot of data that you don’t need, which can take up precious time and system memory.

Files and folders

So the solution to this is to get the latest file from each folder, which contains all the data for that month. I can you do this in Power BI?
Just to make it easy for this demo, I transferred all the files from the storage account to a local folder on my computer.

Get data in Power BI

Let’s start with Power BI. Click Get Data, select Folder and browse to the root folder that contains all month folders. For me this is the folder C:\Demo. Click the OK button to continue.

(Note, if you want to do this using an Azure storage account, choose Azure Blob Storage, fill in the storage account name and select the correct container.)

You will see that the preview screen shows all the csv files that are in all subfolders in the root folder. Click the button Transform Data, because we need to add some steps to this transformation.

Latest file per folder

After Power BI finished loading the data into the Power Query editor, look at the data it has imported. If you look closely, you will see similar data that you will see in the File Explorer. File name, folder path, file extension and file dates. And also the Content column that contains the binary file content.

The first step is to transform this data to get the latest file date per folder. To do this, we are going to use grouping.

  • In the Power BI menu ribbon click Transform > Group By
  • Using Basic group by, select Folder Path as column
  • For the new column name, type LastDateCreated
  • Select the operation Max
  • Select the column Date created
  • Click the OK button

Now we have a table with the latest date created per folder. Rename this table to LastDatePerFolder.

Merge queries

Now repeat the step again the get all the files from the folders to create a new table. Rename this table to LastFilePerFolder.

  • Select the LastFilePerFolder table
  • In the menu ribbon, click the Merge Queries button
  • From the current table, click the Date created column
  • Select the table LastDatePerFolder and click the LastDateCreated column
  • Select Right Outer as join kind, as we want only to get the files that match the latest date created
  • Click the OK button to close the window and apply the merge

Now you see in the table preview we only have the files that we need, which are the latest files in the folder.

Transform files

Because we only need the content column, right click the Content column and select Remove other columns.
Click the Combine Files button in the column header to combine the content of all files. When all files have the same column format, this step will be no problem and your queries pane will look something like this.